To provide a visual display of the major steps or activities in a process.
Examples:
| Beginning Steps | Ending Steps |
| (Input) | (Output) |
| Mail comes in | Mail delivered |
| Form comes in | Data entered |
| Information requested | Catalog mailed |
| Student admitted | Fees paid |
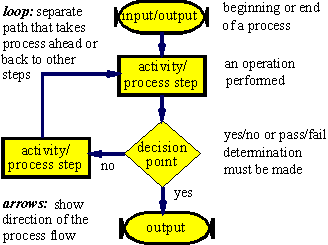
| Input/Output | The beginning or end of a process |
| Activity Process | An operation performed |
| Decision Point | A point in the process where a yes/no or pass/fail determination must be made |
| Wait State | A point at which the process is temporarily halted to wait for input, operation, or information from outside the process. |
| Loop | A separate path that takes the process ahead or back to other steps. |
| File or Data Storage | An output in the process ends in hard copy or electronic storage. |
| Document | Printed paper output from the process |
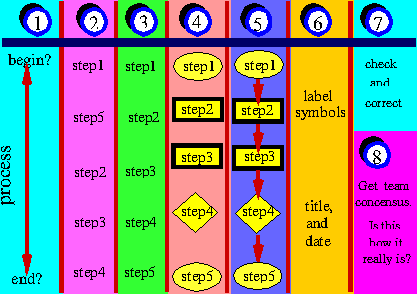
| Page Break | Use when the chart is longer than one page |
| Lines and Arrows | Shows the direction of the process through various steps. |